How to Create a Binance API Key (Step-by-Step)
To connect your Binance account with AuroraTrading.app, you need to create an API key inside Binance and configure permissions safely.
Register Binance
If you don't have a Binance account yet, create one at:
Important Notes Before You Start
Use the Binance website API key creation is handled in a browser, not in the basic app flow. Make sure your account has 2FA enabled.
Never enable withdrawals For Aurora connection, use only the minimum required permissions (Read/Trade as needed).
Understand Binance IP policy for API permissions Binance restricts unrestricted-IP keys. If you need trading-level permissions, plan your IP allowlist first.
(Website) How to create your own Binance API Key via web?
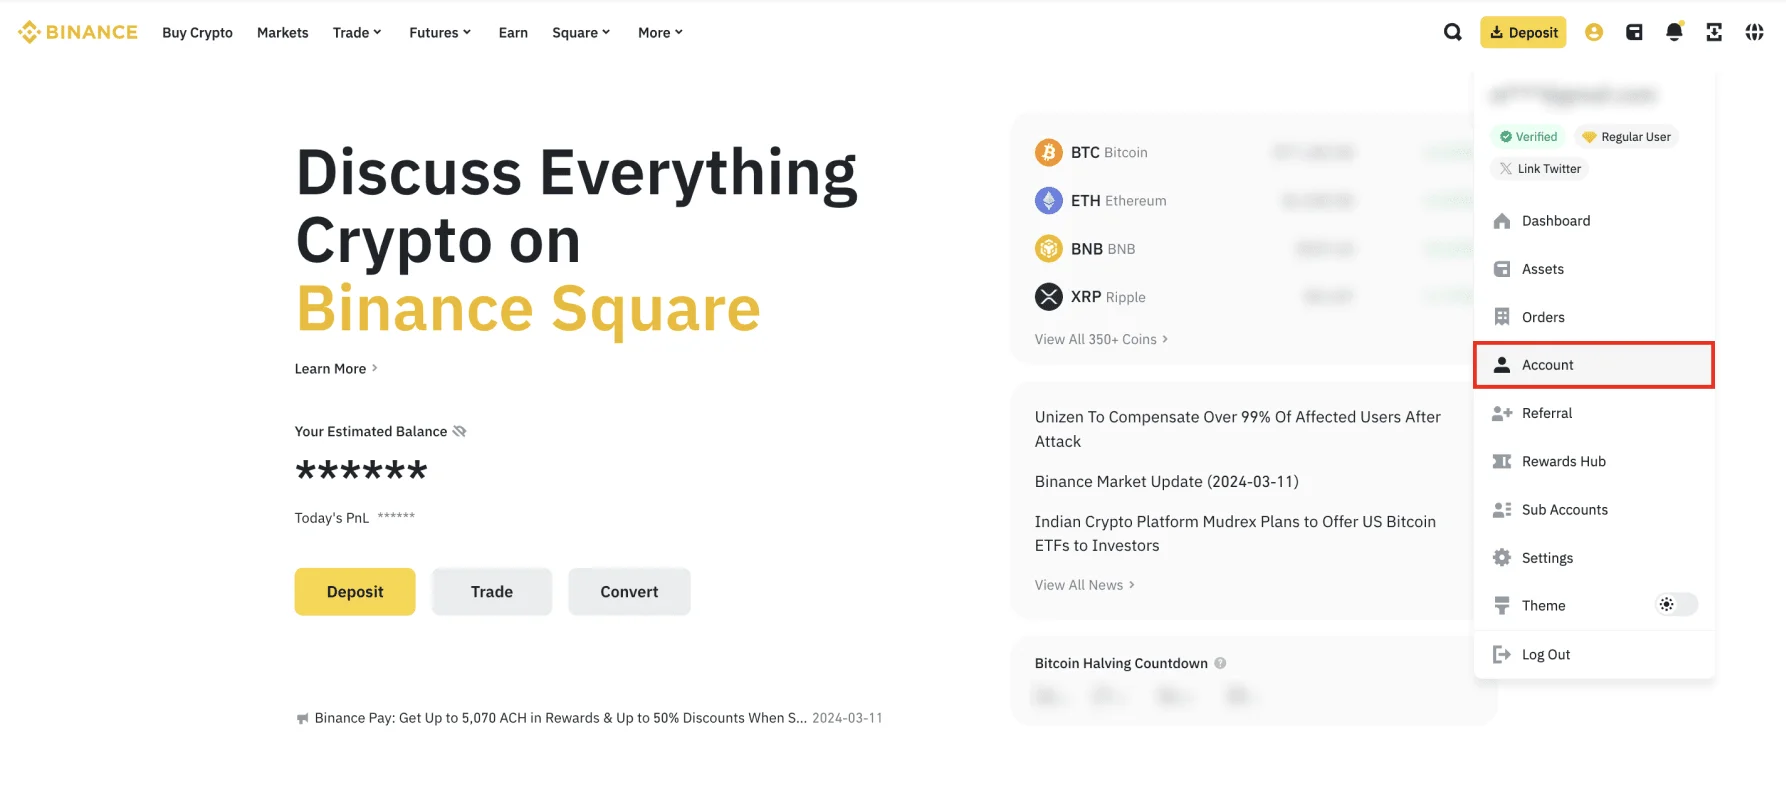
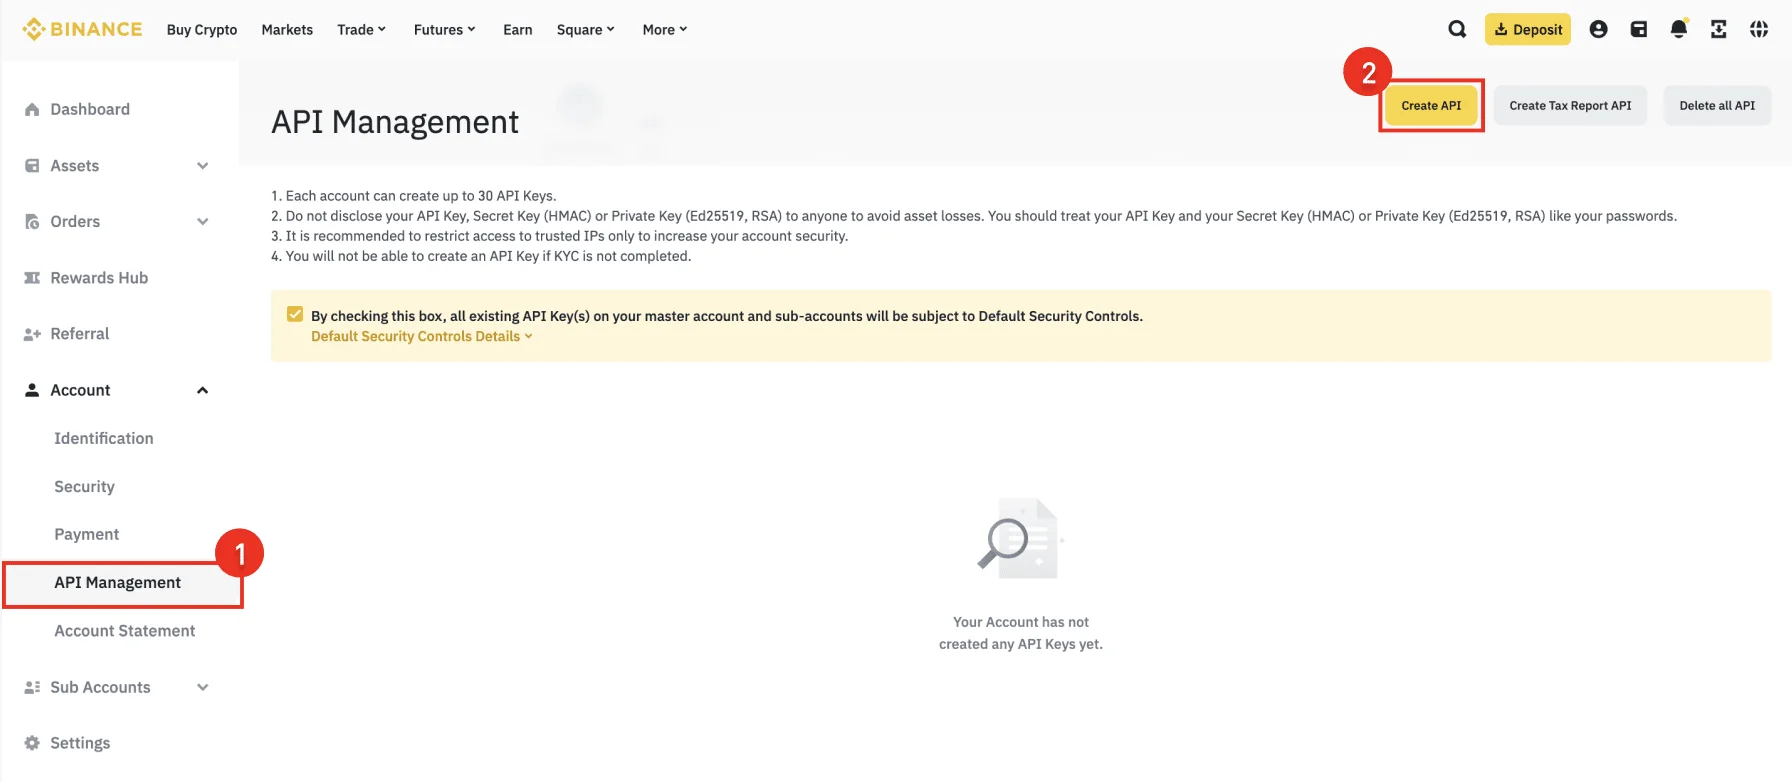
Step 1 - Open Account and API Management
- Log in to Binance.
- Click your profile icon and open [Account].
- Go to [API Management].
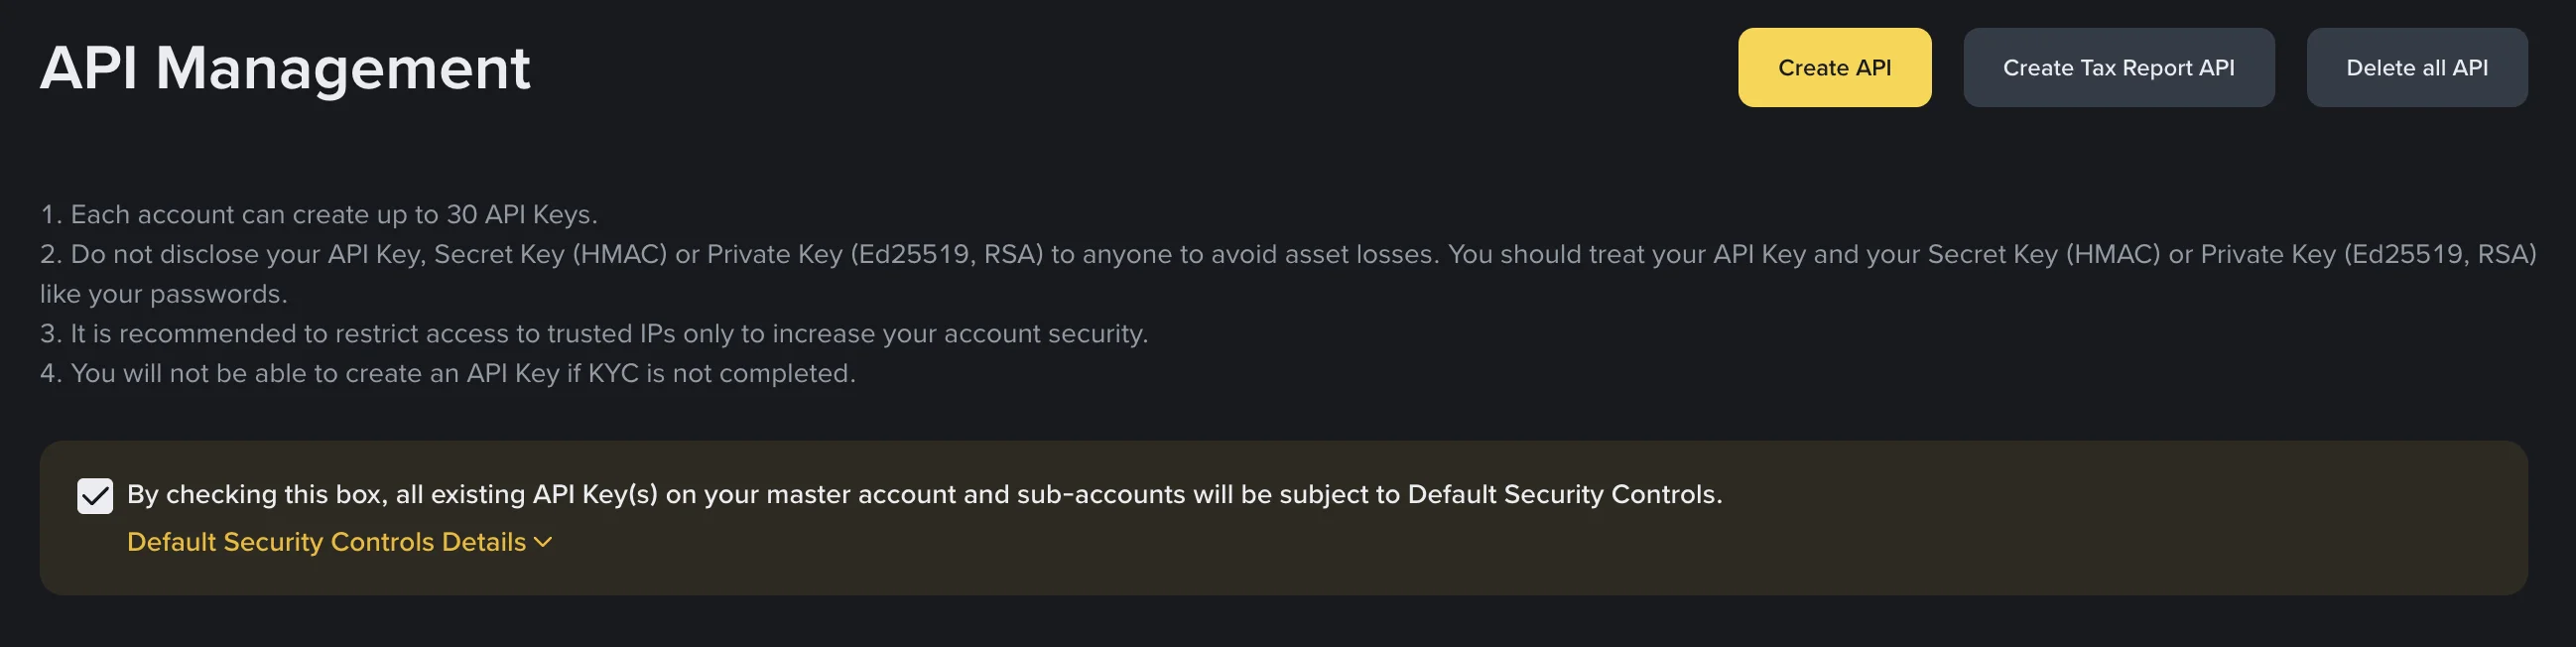
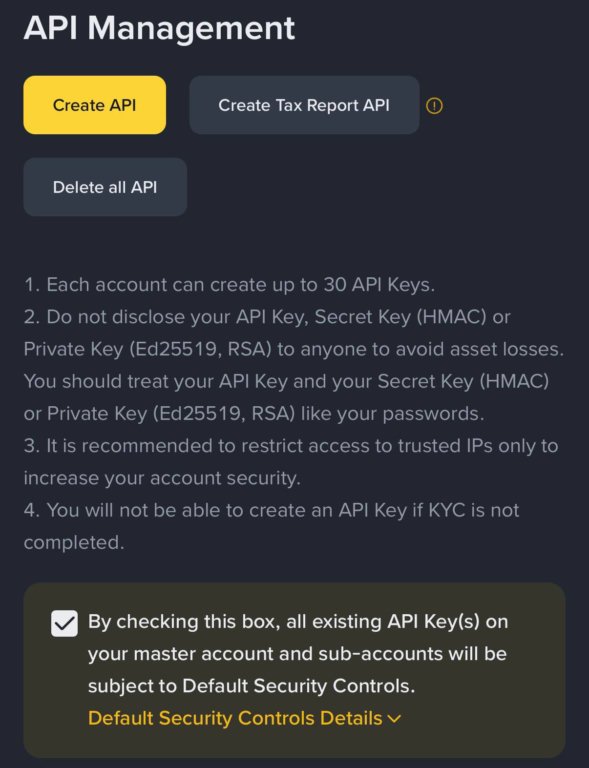
Step 2 - Default Security Controls (for Unrestricted IP setup)
On some Binance accounts, default security rules for unrestricted-IP API keys can force trusted-IP whitelisting for Futures permissions.
If your current Aurora setup uses rotating outbound IPs and stable allowlisting is not available yet:
- In API Management, uncheck the Default Security Controls checkbox.
- Open Default Security Controls Details, tick the confirmation checkbox in the modal, and click Confirm.
- Return to your API key restrictions and keep only required permissions for Aurora (for example, Enable Reading + Enable Futures), with withdrawals disabled.
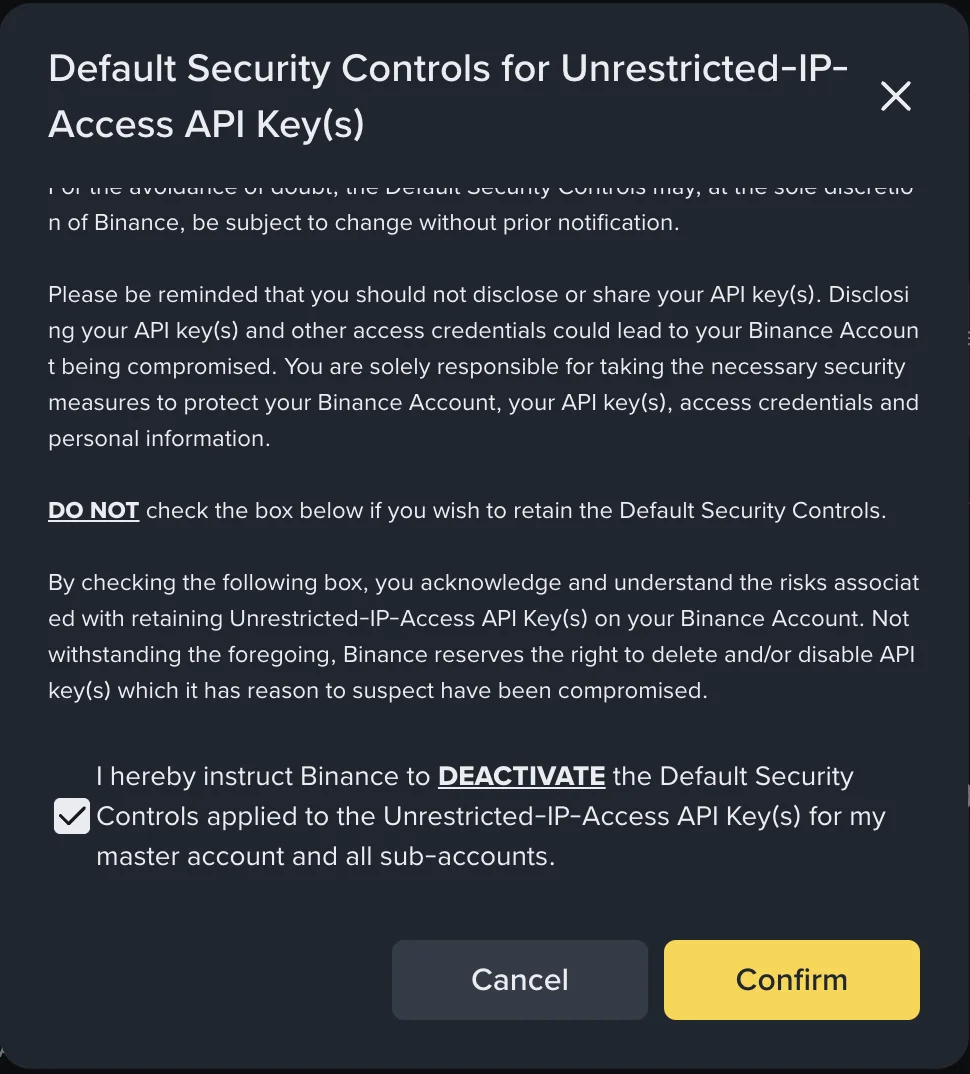
Security tradeoff: Disabling default controls reduces protection for unrestricted-IP keys. The safer long-term setup is fixed static egress IP(s) plus trusted-IP whitelist.
Step 3 - Select API Key Type
- In [API Management], click [Create API].
- Choose your preferred key type. For most Aurora users, System-generated API key is the standard choice.

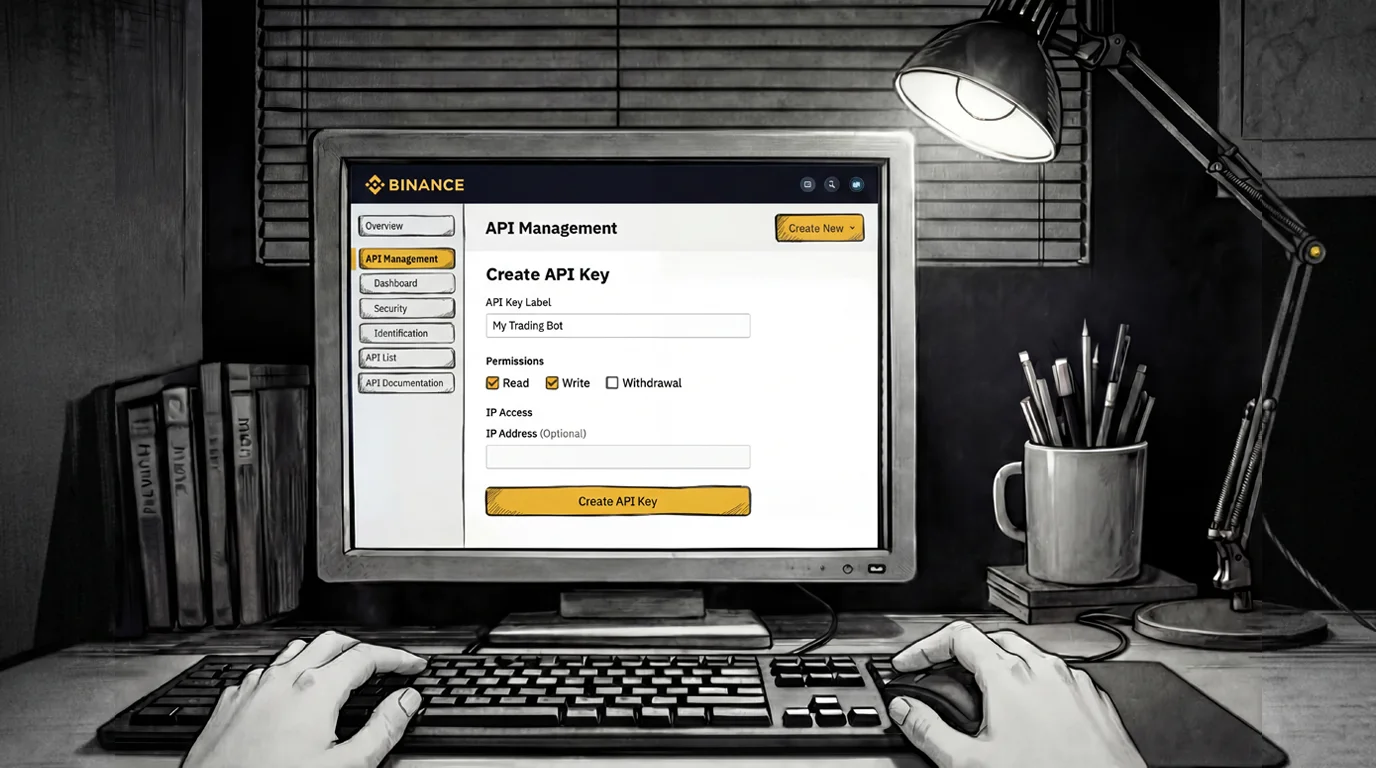
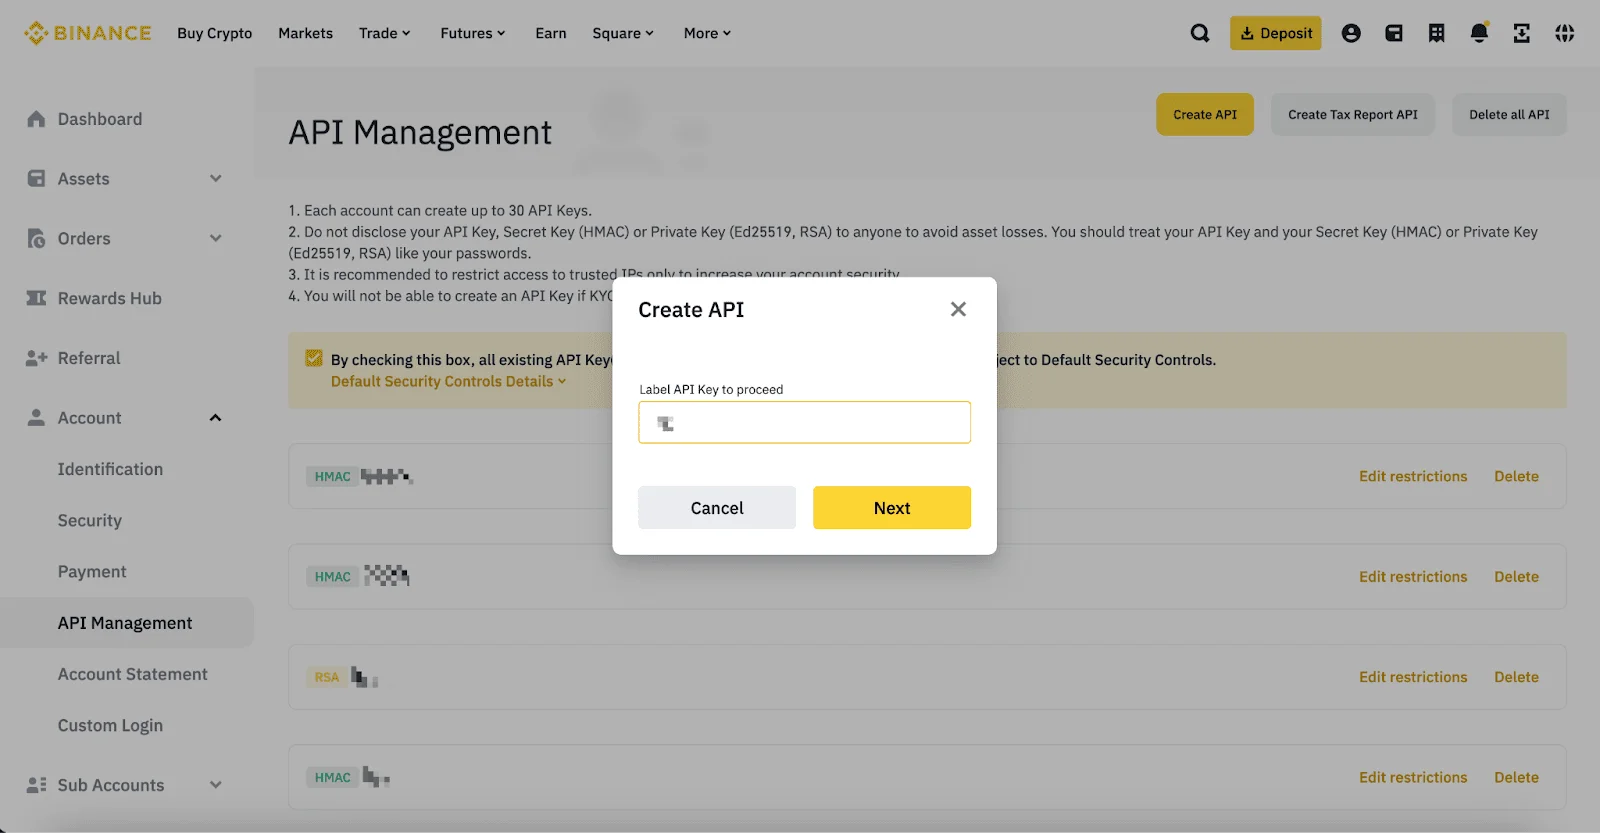
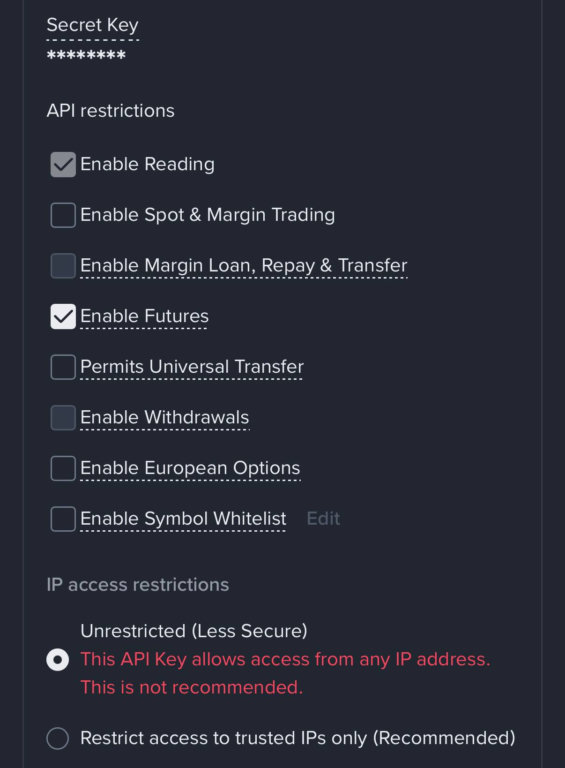
Step 4 - Configure Label and Permissions
Set up the key with least-privilege access:
- Label / name: use something clear, for example
AuroraTrading - Permissions:
- For automated execution: enable Futures Trading (
Enable Futures) and required Trading permissions - For analytics only: keep it Read-Only
- Never enable withdrawals
- IP restriction: set to Unrestricted
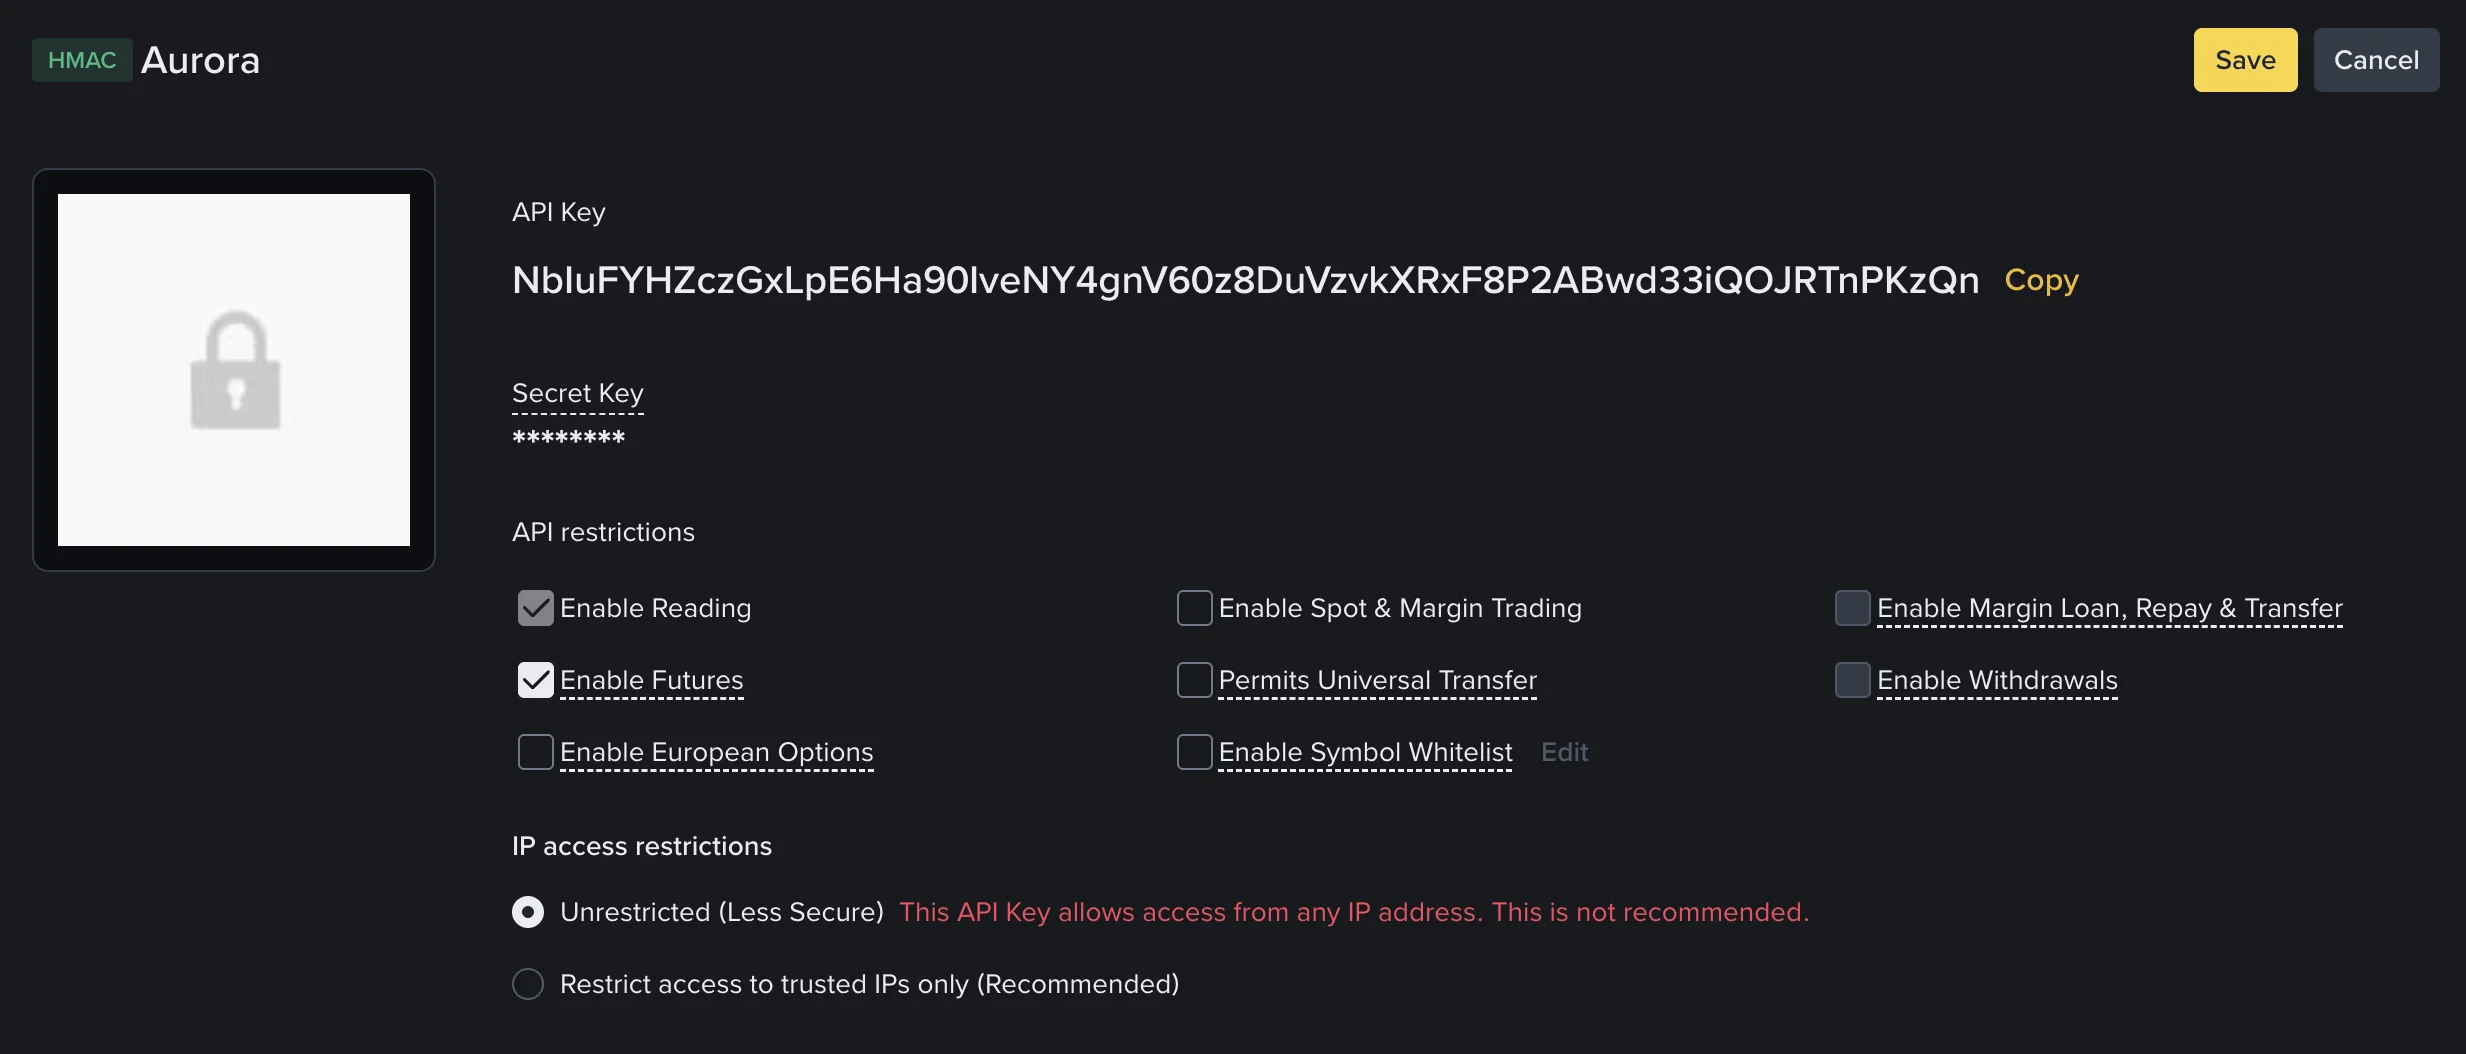
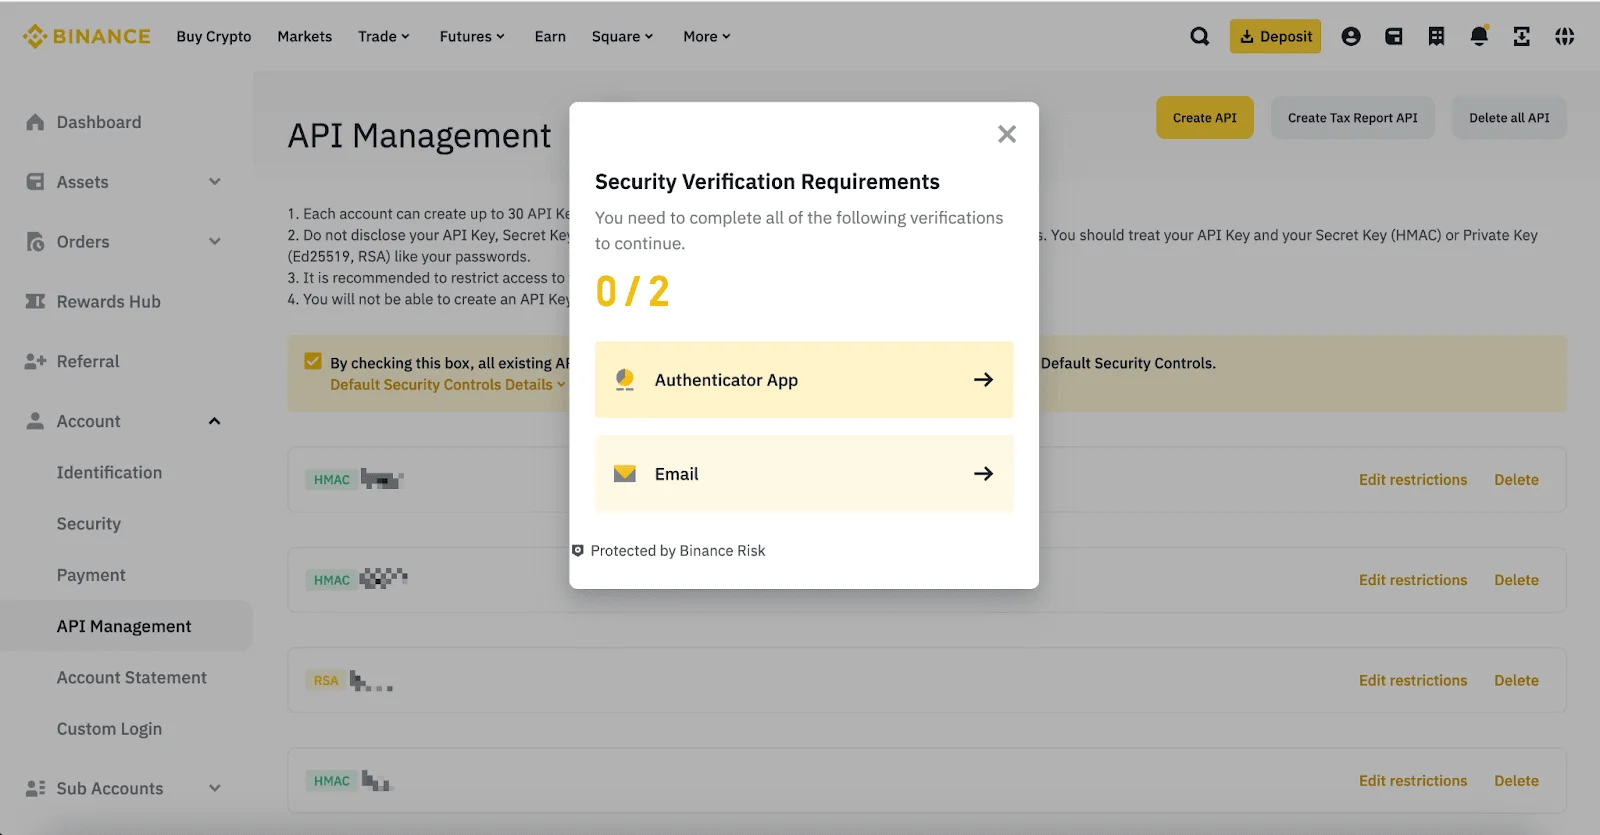
Step 5 - Complete Security Verification and Save Secrets
Confirm with your security checks (2FA/passkeys/email). After creation, copy your API Key and Secret immediately and store them securely (the secret may be shown only once).
(App) How to Create Your Own Binance API Key via the App
App Step 1 - Open Binance Pro and API Management
Open the Binance app, switch to Pro mode, tap More, then in services go to Other and open API Management.


App Step 2 - Disable Default Security Controls (if using rotating IPs)
In the Binance app API Management screen, disable Default Security Controls for unrestricted-IP API keys if Futures permissions are blocked by enforced trusted-IP policy.
- Uncheck the Default Security Controls box.
- Open Default Security Controls Details.
- In the risk warning modal, confirm the opt-out.

Security tradeoff: This reduces protection for unrestricted-IP keys. Long-term best practice remains fixed static egress IPs with trusted-IP whitelist.
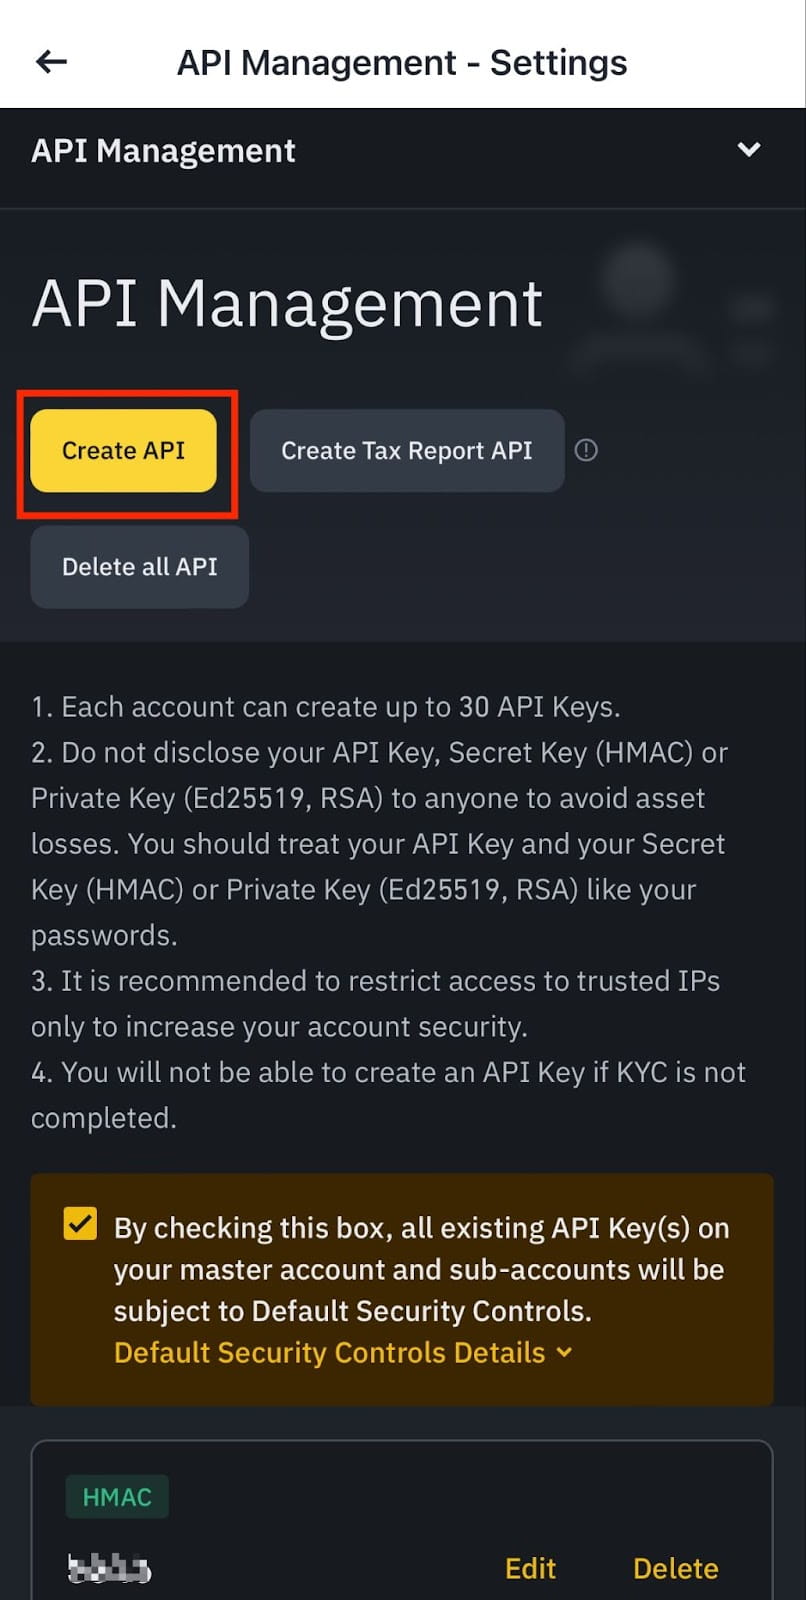
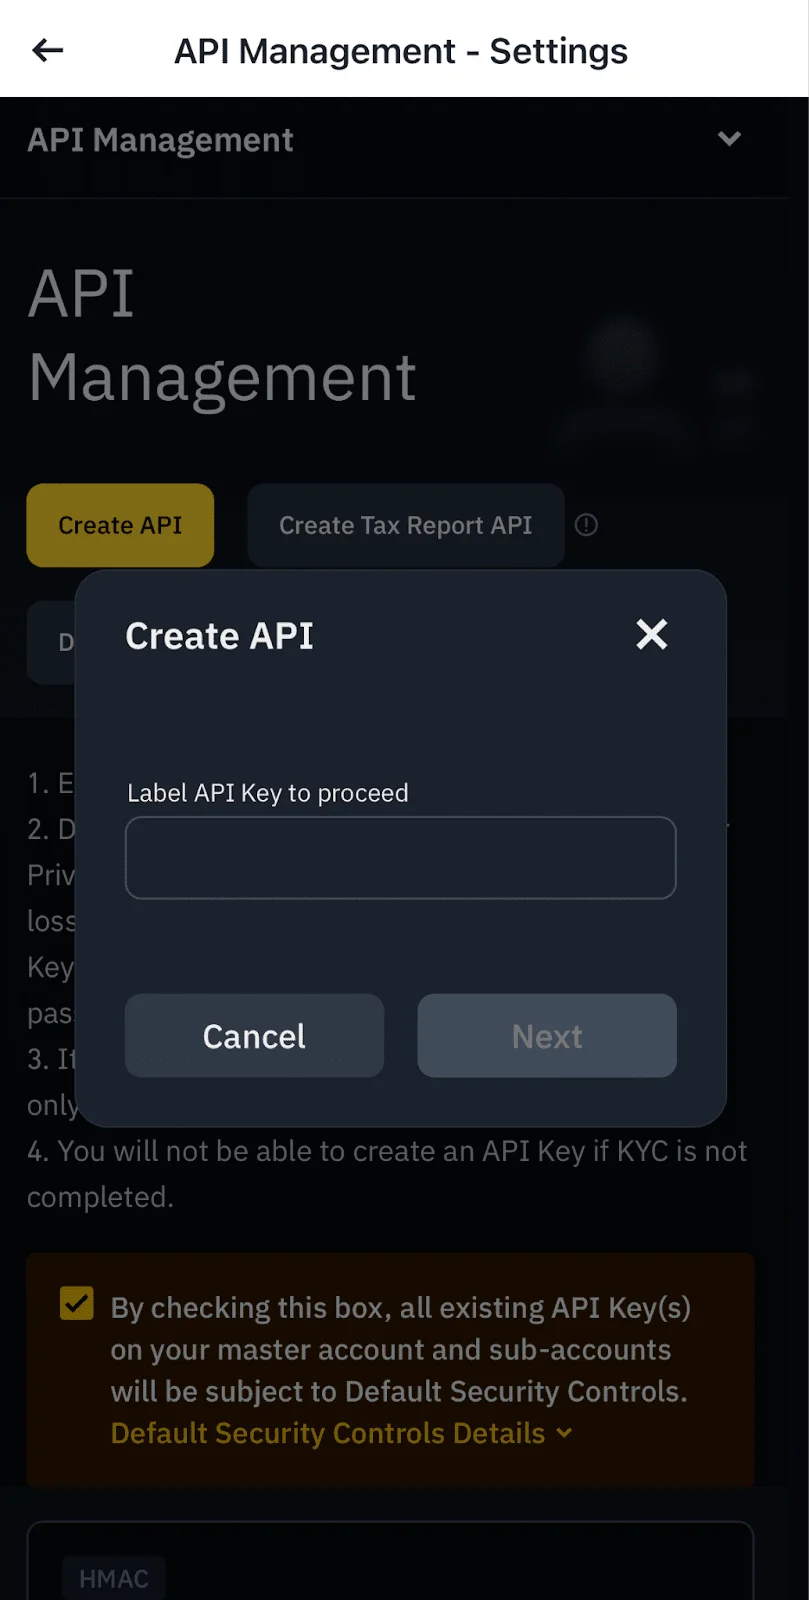
App Step 3 - Tap Create API
Tap Create API to start creating a new key.
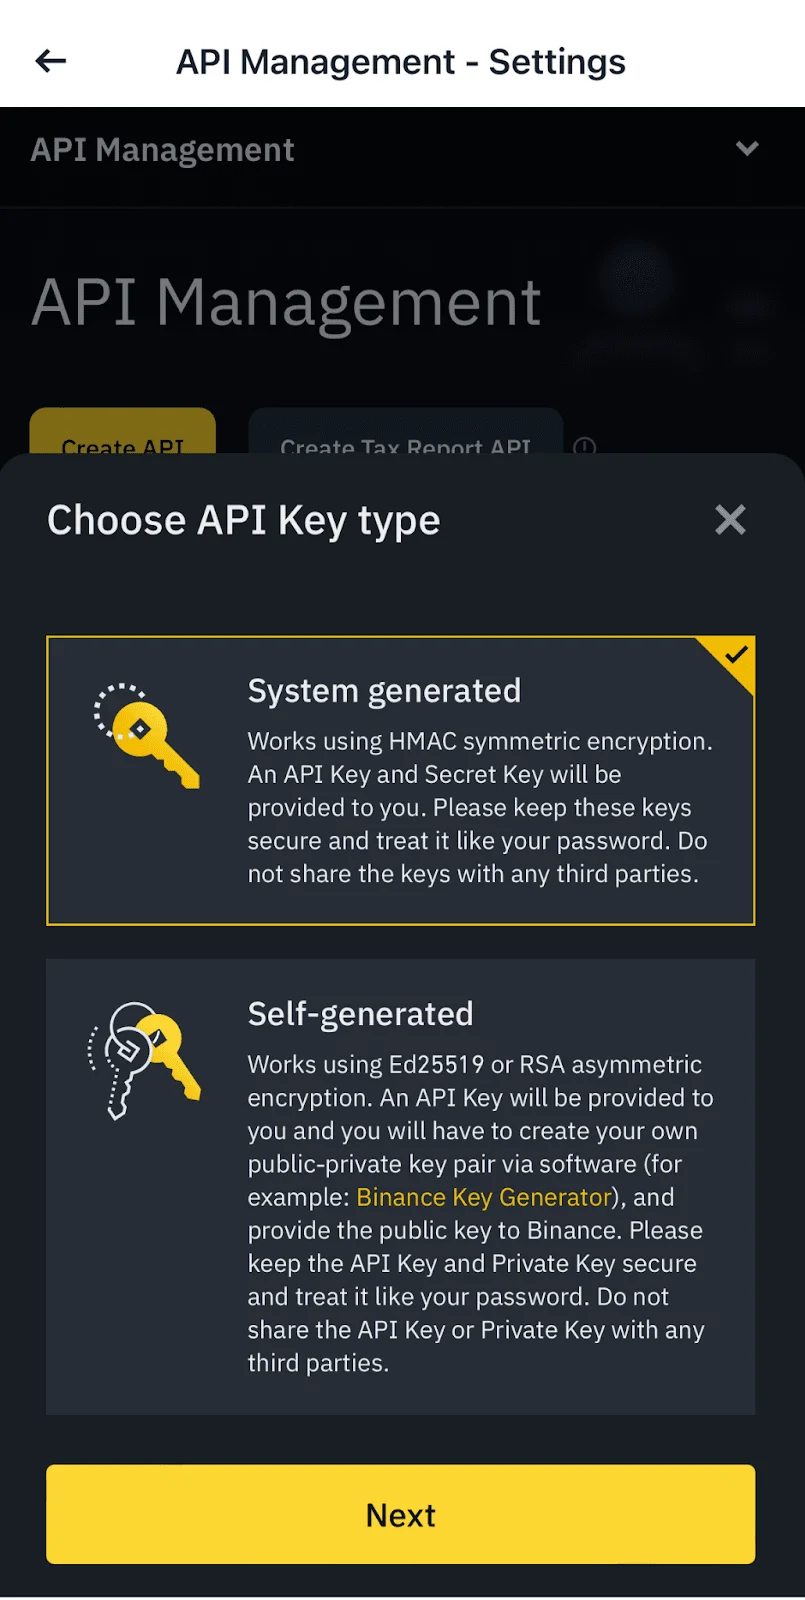
App Step 4 - Select API Key Type
Choose your preferred API key type (system-generated is the standard option for most users).
App Step 5 - Enter Label / Name
Set a clear key label (for example: AuroraTrading).
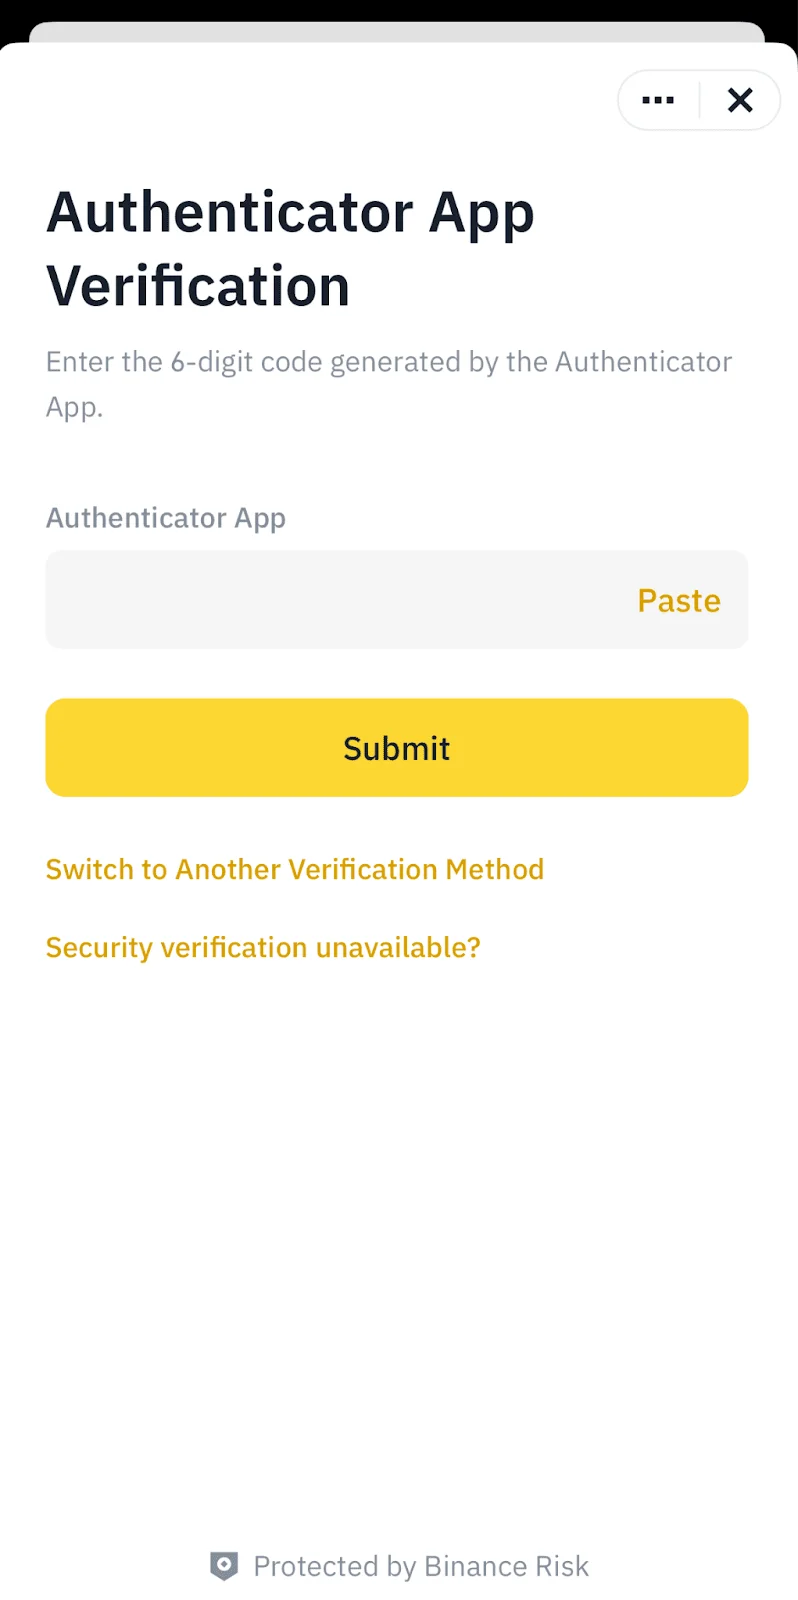
App Step 6 - Complete Security Verification
Confirm with your enabled security methods (2FA/passkeys/email).
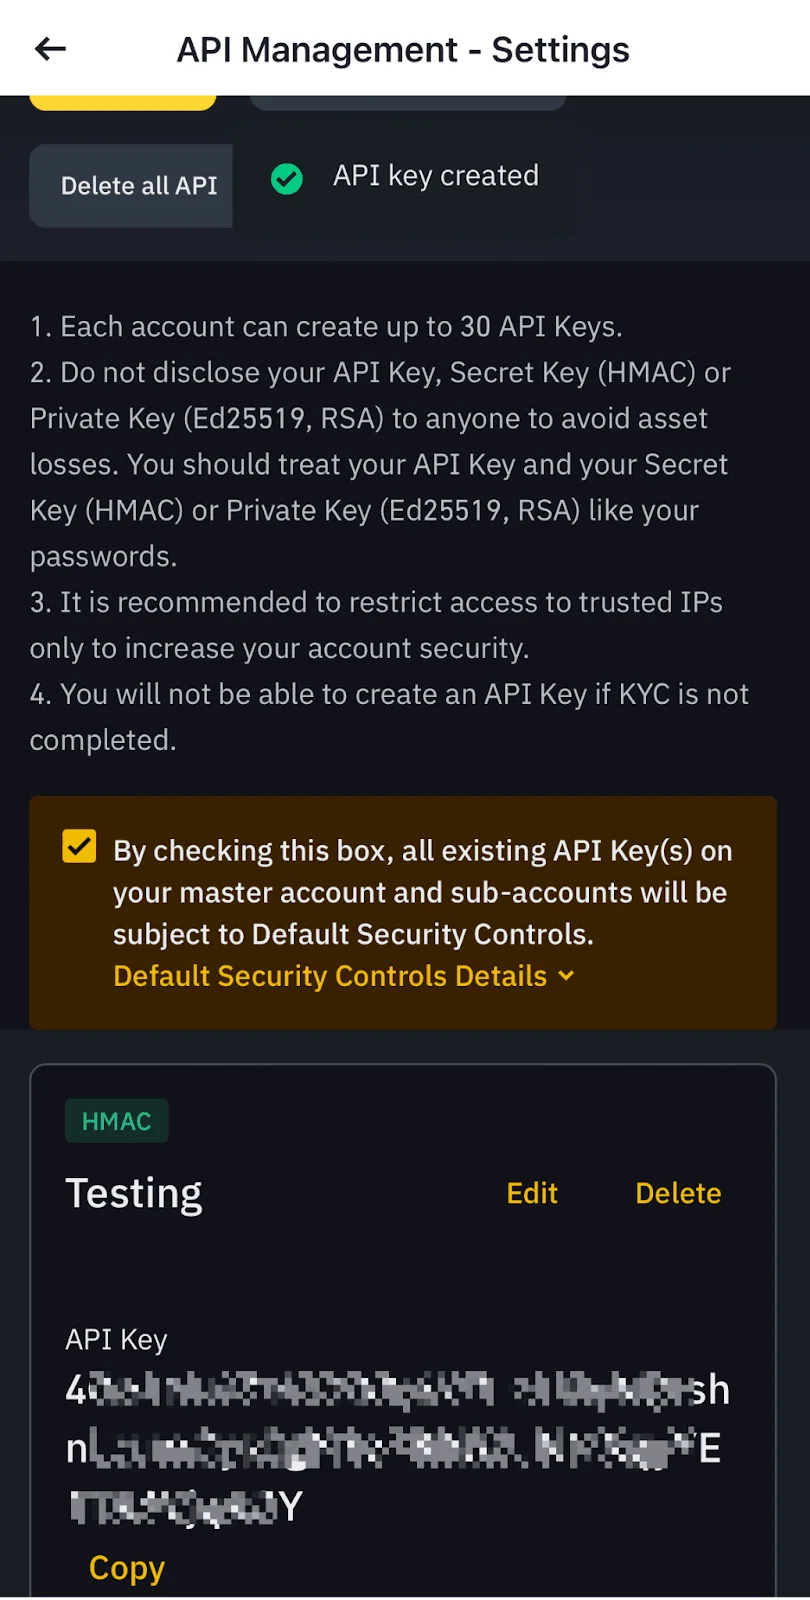
App Step 7 - API Key Created
After verification, your API key is created. Copy the key/secret and store them securely.
Done! Your API Key is Ready
Your Binance API key is now ready. Next, paste it into AuroraTrading.app to connect the exchange.
Next Steps in Aurora
- Download the Aurora desktop app to connect Binance and start execution.
- Review API key safety best practices before live trading.
- Compare exchange-specific setup guides for Bybit and Bitget.
Quick FAQ
Should I choose Read-Only or enable Trading permissions?
If you only need analytics, use Read-Only. If you need automated execution, enable the required Trading permissions only. Always keep withdrawals disabled.
Do I need IP allowlisting?
If you want stronger security and/or expanded permissions, yes. But make sure you can maintain a stable allowlist to avoid accidental lockouts.